Have you ever thought about having your Facebook photos right on your site without using plugins that direct you back to a third party site? With today's guide, we'll explain how.
Today's guide will cover integrating photos from a page you manage (ie not your personal album, but a business page) in a customizable manner. You will need to ensure that you are an administrator of the page (please refer to this official Facebook guide for steps on how to become a page administrator).
This guide requires basic knowledge of PHP, HTML and CSS. Here is the step-by-step procedure.
Facebook Developer
The first step is to log in to the Facebook developer page.
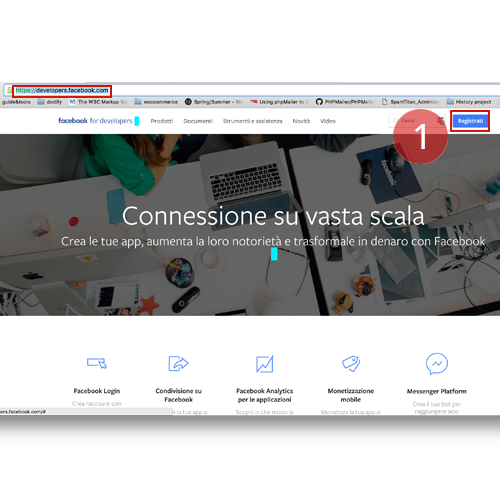
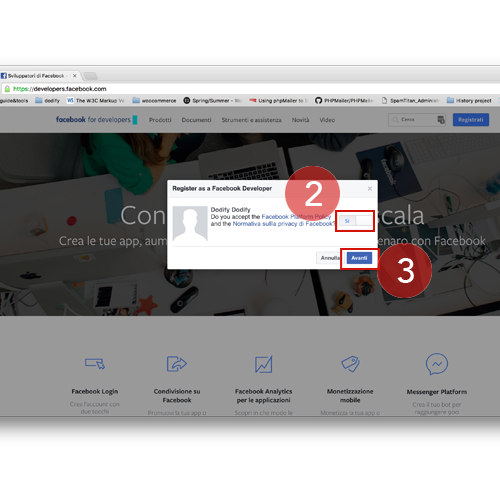
Click on register and accept the Facebook’s Privacy Policy.
Create Application
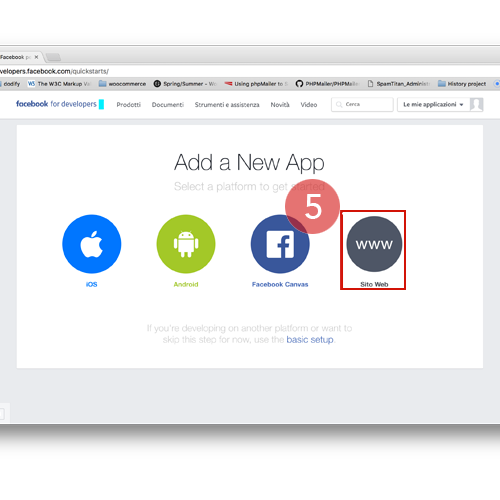
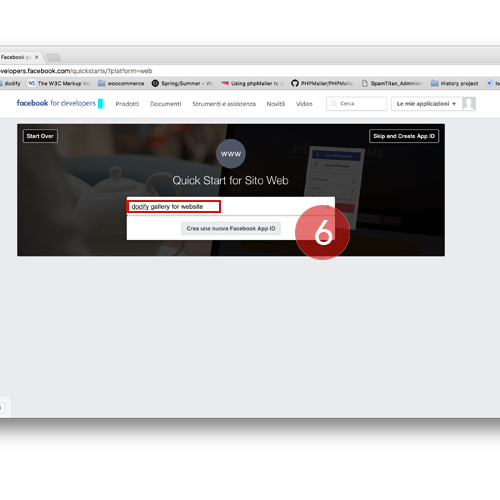
If everything goes well, you'll choose which platform to use for your Facebook application. In our case, we chose the WWW Web site option.
Choose a name for your application (eg: dodify gallery for website) and click on "Create a new Facebook App ID".
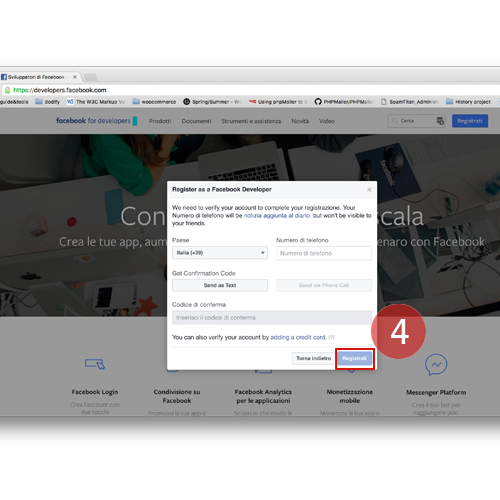
Enter your email address, choose a category, then proceed to complete the photo security check.
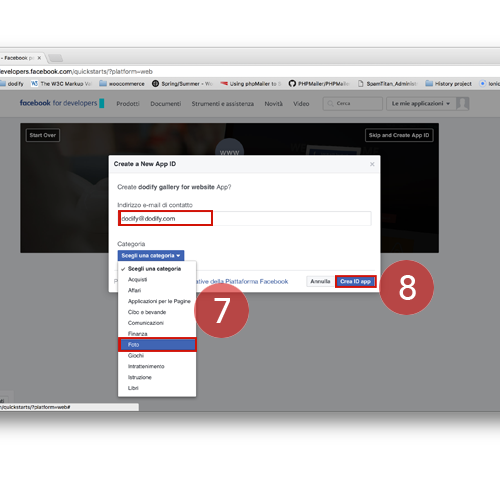
You will now be asked to confirm your account by entering your phone number (in which you will be sent a verification code to your mobile phone), or your credit card; choose the option you prefer and go forward.
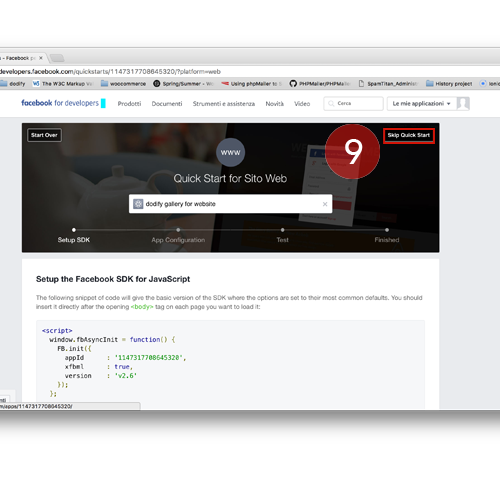
Once you have passed the security check, click on the top of "Skip Quick Start" if you want to go directly to the configuration, otherwise fill out the page to start testing and familiarize yourself with the codes that Facebook provides.
Configure the Gallery
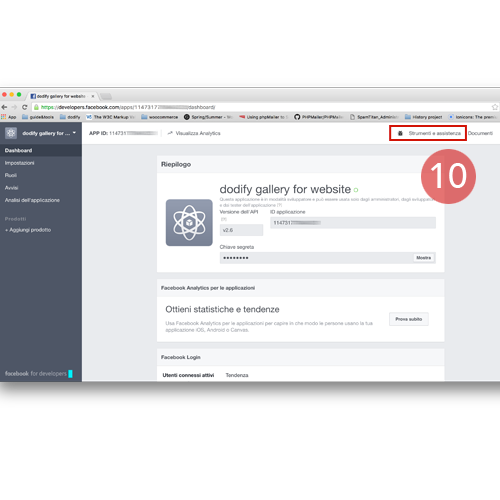
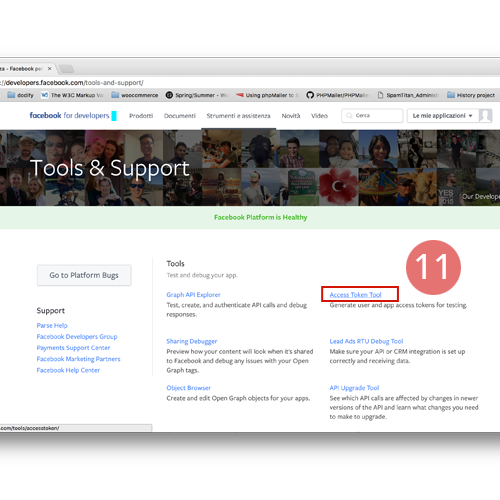
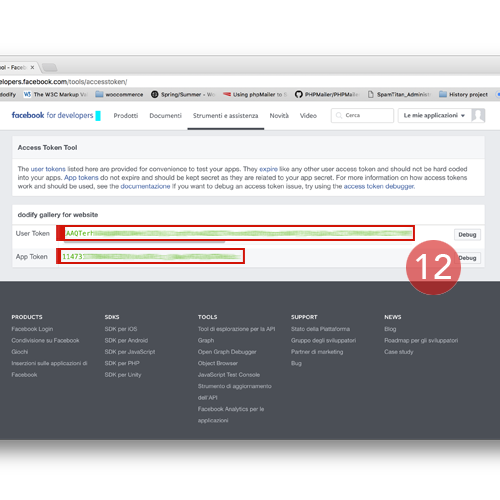
You will now find yourself at the summary data page for your application. Click on "Tools and Support" at the top right and you'll find a support page. By clicking on "Access Token Tool" you will retrieve the Access Token required for the script that will be inserted on your website.
Once you have the Access Token insert the following PHP script in your website where you would like to the gallery:
<section id="gallery">
<?php
    $access_token="[YOUR_ACCESS_TOKEN]";
    $json_link = "https://graph.facebook.com/v2.3/[INSERT_APPID]/photos?fields=images,name,link&limit=9&access_token={$access_token}";
    $json = file_get_contents($json_link);
    $result = json_decode($json);
    $j = 0;
    foreach($result->data as $image) {
        // Look for third image (instead of large version)
        for($i = 2; $i > 0; $i--) {
            if(isset($image->images[$i])) {
                $name = (isset($image->name) ? $image->name : "");
                echo "<a class=\\"photo$j\\" href=\\"{$image->link}\\" title=\\"{$name}\\" rel=\\"external\\" style=\\"background-image: url('{$image->images[$i]->source}')\\"></a>";
                break;
            }
        }
        if($j % 3 == 2) {
            echo "<br />";
        }
        $j++;
    }
?>
</section>
And the following CSS code in your style sheet:
/* Facebook gallery section */
section#gallery {
    padding: 5% 0;
    text-align: center;
}

section#gallery a {
    background-size: cover;
    background-position: center;
    width: 250px;
    height: 250px;
    margin: 1%;
    display: inline-block;
}
As well as the Access Token, this script also requires the ID of the album to be shared (the App ID). You need to replace both of these values at the top of the script. You can find the App ID by going to the page that contains the album you wish to use and clicking on the name of the album.
You will see the ID number in the URL (for example: https://www.facebook.com/dodify/photos/?tab=album&album_id=166584040137458 the ID is 166584040137458).
By default, the most recent 9 photos will be displayed in a 3x3 grid.
The piece of code fields=images,name,link is used to take the image, name and link to each photo from the album. To change these parameters, we recommend you visit the official Facebook guide.
To change the number of photos to be displayed, simply change the value of limit=9. If you want to see some examples visit the ISS Sardinia page where you will find the photo gallery at the bottom of the homepage.
Sign up for our newsletter and stay in touch with dodify as you wait for our new guides!
Share this article