Have you never thought of seeing your Instagram gallery on your website, without using that boring plugin full of advertisements? Now, with this little tutorial, I will explain how to do it.
This guide requires basic knowledge of the following programming languages: PHP, HTML and CSS.
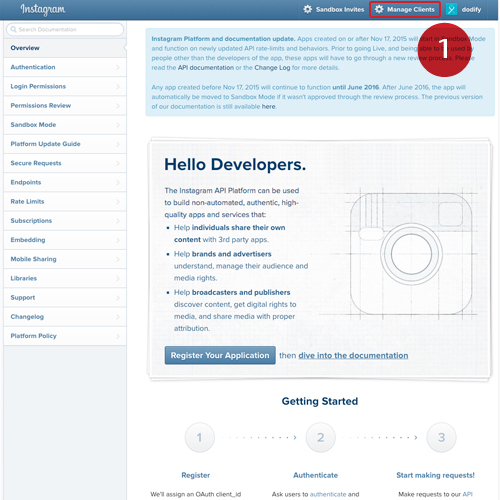
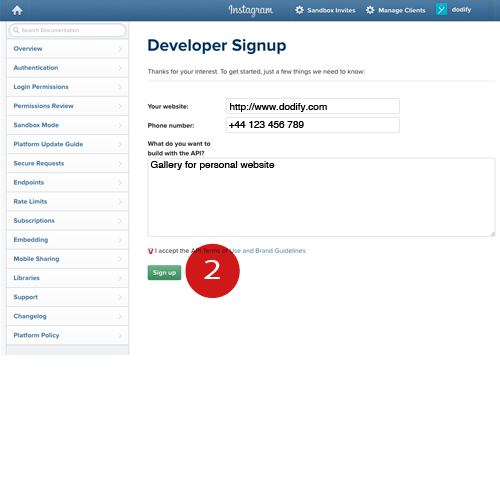
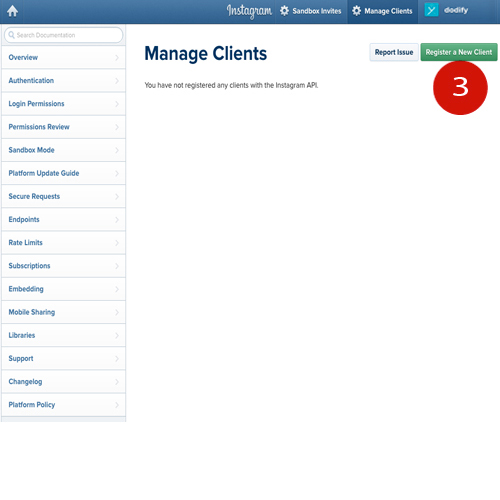
First of all, you have to register your Instagram account on the Instagram Developer website. Once you have logged in, click on the “Manage Clients” section on the top-right corner; now fill out the required fields with the address of the website which you want to add the gallery to, your phone number and the reason of you want to build this API powered application (usually I simply write “gallery for personal website”).
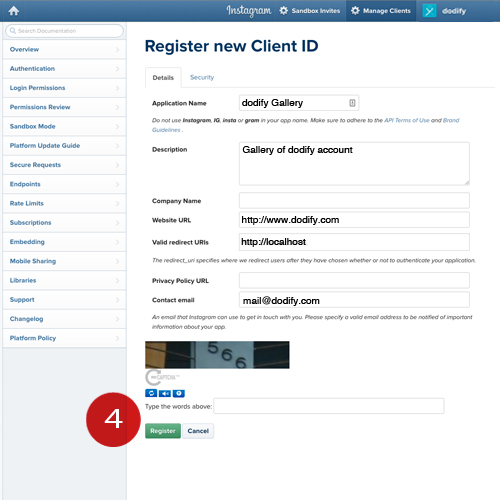
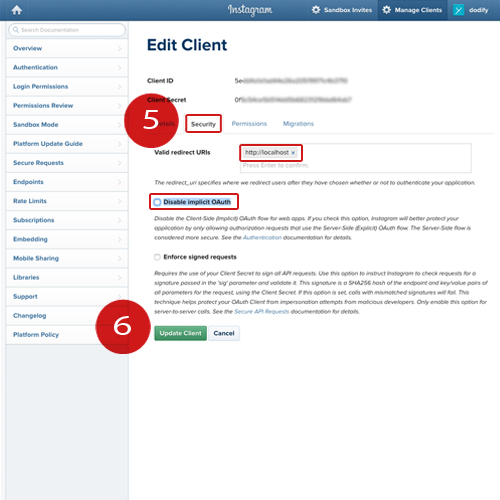
After you have accepted the terms of use of the API, it will open one more page that you have to fill out with your personal data: you have to assign a name for the application (e.g. dodify Gallery), a description (e.g. dodify account gallery), an email address and you will have to re insert your website’s address. In the redirect field insert http://localhost and press enter. After that, go to the “Security” tab: for the field “Valid redirect URIs” check if http://localhost is correct; deactivate “Disable implicit OAuth” input and click on “Register”. At this point, it will open a new page that will confirm your data.
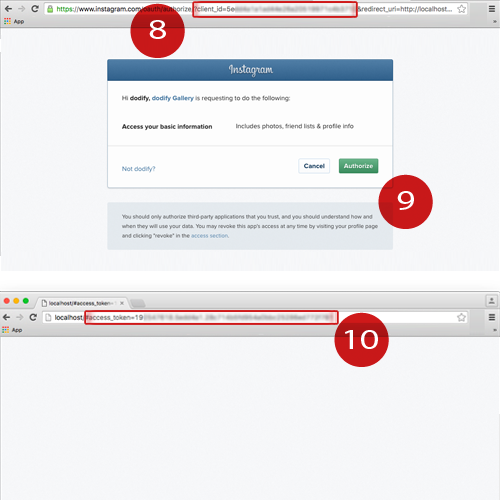
The next step is to create the “Access Token” to use the API. Copy and paste this code on your browser https://instagram.com/oauth/authorize/?client_id=[CLIENT_ID_HERE]&redirect_uri=http://localhost&response_type=token changing [CLIENT_ID_HERE] with your client Id assigned from Instagram (careful, don’t leave the parentheses!). If everything goes well, it will show a new page that will ask you to confirm the access to the account’s information. After authorizing this, in the browser’s address bar you will find the account’s “Access Token”: copy it and never show it to anybody because it allows full access to your account.

Once you have the “Access Token”, you can use this little PHP script (replacing the user id and access token):
<?php
    $userid = "[YOUR_USER_ID]";
    $accessToken = "[YOUR_ACCESS_TOKEN]";
    $url = "https://api.instagram.com/v1/users/{$userid}/media/recent/?access_token={$accessToken}&count=4";
    $ch = curl_init();
    curl_setopt($ch, CURLOPT_URL, $url);
    curl_setopt($ch, CURLOPT_RETURNTRANSFER, 1);
    curl_setopt($ch, CURLOPT_TIMEOUT, 20);
    curl_setopt($ch, CURLOPT_SSL_VERIFYHOST, 0);
    curl_setopt($ch, CURLOPT_SSL_VERIFYPEER, 0);
    $result = curl_exec($ch);
    curl_close($ch);
    $result = json_decode($result);
    foreach($result->data as $post) {
        echo "<a href=\\"{$post->link}\\" title=\\"{$post->caption->text}\\" rel=\\"external\\">" .
                "<img src=\\"{$post->images->standard_resolution->url}\\" alt=\\"{$post->caption->text}\\" />" .
            "</a>";
    }
?>
This script, if placed in your website, will show the last 4 photos posted on Instagram. If you prefer to see more photos, you can change the “count” value. Now, with a little knowledge of CSS, you can customize your gallery as required. If you want to see some examples, visit Boomerang Charter or TheLivExperience.
Subscribe to our newsletter to keep in touch with dodify or follow us on social media to be notified once we publish a new guide!
Share this article